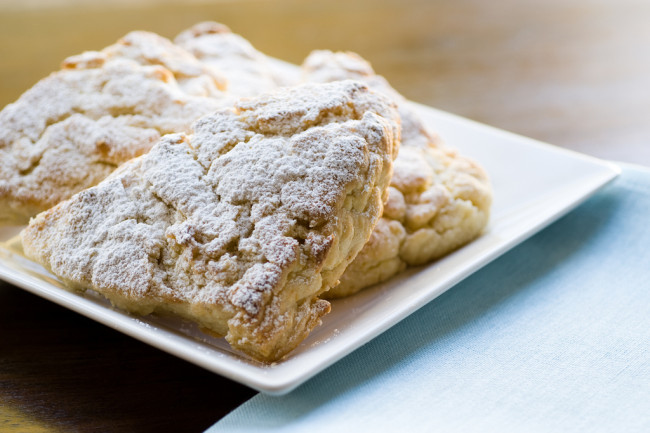
The first scone I ever ate came from the first batch I ever baked. It’s true. Up to that point, my appetite for morning treats was limited to the usual suspects: bagels, donuts, muffins, maybe the occasional croissant. Several years ago, when I was first learning to bake, I offered to bring some baked goods to a family brunch. I opened Williams-Sonoma’s Essentials of Baking and looked for the least intimidating recipe I could find. Scones looked like a reasonable challenge…once I discovered where to find currants at the grocery store. That first batch set a new personal standard, and it was made clear to me that henceforth the price of admission to any family brunch was at least one batch of scones.
Since then, I’ve become a bit of a scone snob. I don’t want any part of those sickly-sweet, glazed lumps they sell at certain coffee shops. I want something that is rich and buttery, slightly sweet, and just a bit dry and crumbly.
This is my recipe for a traditional cream scone. They have a tender crumb and not-too-sweet flavor that allows the lemon and butter to come through. I spent a few weeks working through several variations before I arrived at this recipe. While they are traditionally considered a breakfast treat, enjoy these anytime with a cup of coffee or tea.
It is always a good idea to read the recipe top to bottom before getting started.
Yield
8 scones
Ingredients
- 3 cups (15 oz) all purpose flour
- ½ cup (4 oz) granulated sugar
- 1 tablespoon plus 1 teaspoon baking powder
- ½ teaspoon salt
- 3 teaspoons lemon zest
- ¾ cup (6 oz) cold unsalted butter, cut into ½ inch bits
- 1 cup heavy cream
- For Dusting: 2 tablespoons powdered (confectioner’s) sugar
- Preheat oven to 400 F. Move rack to the middle position.
- Line a cookie sheet or half-sheet pan with parchment paper or a silicone liner.
- Combine flour, sugar, baking powder, salt, and lemon zest in a large bowl. Stir to combine.
- Add the butter to the dry ingredients. Use a pastry blender to cut the butter into the dry ingredients until the mixture resembles large crumbs.
- Pour the cream over the mixture and mix with a rubber spatula until combined. Don’t over mix.
- Press the mixture into a solid mass and then turn it out on a lightly-floured work surface.
- Shape the dough into a square, roughly 7×7 inches. Cut the dough into 8 equal pieces: first cut along the diagonals, then then cut each triangle in half.
- Transfer the wedges to the baking sheet and space evenly.
- Bake for 15-17 minutes; until golden brown.
- Transfer to a wire rack to cool.
- Dust the cooled scones with powdered sugar (not too much). A fine-mesh sieve works well for this.
- Eat. Smile. Repeat.
Some Helpful Tips
If you are not familiar with the process of cutting butter into dry ingredients, be patient and go a little longer than you think is necessary.
Some recipes suggest using two knifes to cut butter into dry ingredients. I have no idea if this works, but it sounds like insanity to me. Spend $10 on pastry blender and never look back.
This is a relatively dry dough, which can make it frustrating to work with at first. To help: 1) make sure the butter is thoroughly cut into the dry ingredients, and 2) press the dough firmly into shape before cutting. If you’re still having trouble, you can increase the cream to 1 1/4 cups, but you’ll have to deal with a stickier dough and softer scone.
As always, use fresh, high-quality ingredients. This really does make a difference in the final product.
