Slow Hot Chocolate

Slow Hot Chocolate

With food, as with life, you get out what you put in. Returns are proportional to investment. It shouldn’t come as a surprise that dumping two scoops of powder into a mug of hot milk isn’t an immersive experience. More often than not you end up with a too-sweet, flavorless mugful of swill with a layer of sludge at the bottom. Devotion to this routine has more to do with nostalgia than good taste. Why not try a little harder? Just a bit.

A rich cup of hot chocolate starts with good chocolate. Pick your poison. I prefer dark chocolate in the 60% range for this recipe – something good like Scharffen Berger, Valrhona or TCHO. I keep the additional flavors to a minimum: a touch of vanilla, a dash of cinnamon and a pinch of salt (to help the chocolate “pop”). Another option is just a bit of cayenne to add a little heat. In our house, fresh whipped cream on top is a requirement. Maybe a dusting of grated chocolate if you’re trying to impress someone.

For all the talk of slow hot chocolate, this simple recipe comes together in about 15-20 minutes. Enough time to appreciate the ritual; not so long as to be discouraging. Drink up and slow down.

Yield
This recipe will produce about 26 ounces, enough for 4 reasonable servings. You can also make this ahead and keep it in the refrigerator for 24 hours or so.

Ingredients

  • ¼ cup water
  • ¼ cup granulated sugar
  • 6 oz. chocolate rough chopped (see note above)
  • 24 oz. whole milk
  • ½ teaspoon vanilla extract
  • Dash of cinnamon
  • Pinch of sea salt
  • Fresh whipped cream
  • Chocolate shavings (optional)

Method

  1. In a medium saucepan over low heat, dissolve the sugar in the water.
  2. Add the chocolate, stirring constantly with a whisk to prevent scorching.
  3. Once the chocolate is melted, add the milk and stir regularly, making sure there isn’t any chocolate lingering on the bottom of the pan – mix it in well.
  4. Add the vanilla, cinnamon, and salt and continue stirring over low heat.
  5. Test the temperature with your finger or some more scientific technique, removing it from the heat when it’s a little hotter than your preferred temperature.
  6. Pour in the hot chocolate into you vessel of choice, leaving some room at the top of the glass.
  7. Top off each glass with more whipped cream and perhaps some chocolate shavings, if you’re feeling so bold.
  8. Variation: A pinch of cayenne pepper to give the chocolate some heat.

Lemon Cream Scones

lemonCreamScones

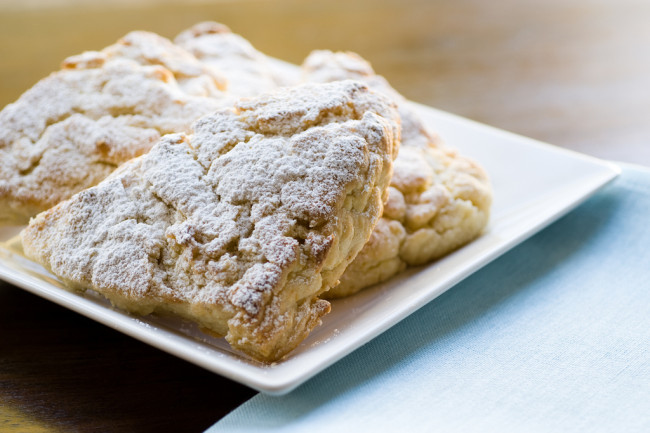
The first scone I ever ate came from the first batch I ever baked. It’s true. Up to that point, my appetite for morning treats was limited to the usual suspects: bagels, donuts, muffins, maybe the occasional croissant. Several years ago, when I was first learning to bake, I offered to bring some baked goods to a family brunch. I opened Williams-Sonoma’s Essentials of Baking and looked for the least intimidating recipe I could find. Scones looked like a reasonable challenge…once I discovered where to find currants at the grocery store. That first batch set a new personal standard, and it was made clear to me that henceforth the price of admission to any family brunch was at least one batch of scones.

Since then, I’ve become a bit of a scone snob. I don’t want any part of those sickly-sweet, glazed lumps they sell at certain coffee shops. I want something that is rich and buttery, slightly sweet, and just a bit dry and crumbly.

This is my recipe for a traditional cream scone. They have a tender crumb and not-too-sweet flavor that allows the lemon and butter to come through. I spent a few weeks working through several variations before I arrived at this recipe. While they are traditionally considered a breakfast treat, enjoy these anytime with a cup of coffee or tea.

It is always a good idea to read the recipe top to bottom before getting started.

Yield
8 scones

Ingredients

  • 3 cups (15 oz) all purpose flour
  • ½ cup (4 oz) granulated sugar
  • 1 tablespoon plus 1 teaspoon baking powder
  • ½ teaspoon salt
  • 3 teaspoons lemon zest
  • ¾ cup (6 oz) cold unsalted butter, cut into ½ inch bits
  • 1 cup heavy cream
  • For Dusting: 2 tablespoons powdered (confectioner’s) sugar
Method

  1. Preheat oven to 400 F. Move rack to the middle position.
  2. Line a cookie sheet or half-sheet pan with parchment paper or a silicone liner.
  3. Combine flour, sugar, baking powder, salt, and lemon zest in a large bowl. Stir to combine.
  4. Add the butter to the dry ingredients. Use a pastry blender to cut the butter into the dry ingredients until the mixture resembles large crumbs.
  5. Pour the cream over the mixture and mix with a rubber spatula until combined. Don’t over mix.
  6. Press the mixture into a solid mass and then turn it out on a lightly-floured work surface.
  7. Shape the dough into a square, roughly 7×7 inches. Cut the dough into 8 equal pieces: first cut along the diagonals, then then cut each triangle in half.
  8. Transfer the wedges to the baking sheet and space evenly.
  9. Bake for 15-17 minutes; until golden brown.
  10. Transfer to a wire rack to cool.
  11. Dust the cooled scones with powdered sugar (not too much). A fine-mesh sieve works well for this.
  12. Eat. Smile. Repeat.

Some Helpful Tips
If you are not familiar with the process of cutting butter into dry ingredients, be patient and go a little longer than you think is necessary.

Some recipes suggest using two knifes to cut butter into dry ingredients. I have no idea if this works, but it sounds like insanity to me. Spend $10 on pastry blender and never look back.

This is a relatively dry dough, which can make it frustrating to work with at first. To help: 1) make sure the butter is thoroughly cut into the dry ingredients, and 2) press the dough firmly into shape before cutting. If you’re still having trouble, you can increase the cream to 1 1/4 cups, but you’ll have to deal with a stickier dough and softer scone.

As always, use fresh, high-quality ingredients. This really does make a difference in the final product.

Wee Willy’s Probably Authentic Scottish Shortbread

weeWillysProbablyAuthenticScottishShortbread

This fourth-generation recipe originated with my Great Grandmother, Williamina Bain McLeod Black. She emigrated from Glasgow, Scotland with her husband and son around 1911. The family settled in San Francisco, where my grandmother, Helen Black Garden was born. Wee Willy, as she was known by those close to her, stood only five feet tall, but had a personality that could fill the room. Of course she claimed this simple recipe as her own, but those who knew her thought it entirely possible that it came from a random issue of Redbook or Better Homes & Gardens.

My mother, Mary Margaret Garden Pritchard, has always held this recipe close to her heart and baked countless batches of shortbread every Christmas, filling the Pritchard household of my youth with the scent of sweet, buttery goodness. Enjoy this recipe and remember to enjoy a nip of the Glenfiddich while you bake, raising your glass on occasion to the memory of Williamena and Helen.

Ingredients

  • 2 cups all-purpose flour
  • 1 cup unsalted butter (cut into 1/2 inch pieces)
  • ½ cup sugar
  • ¾ teaspoon salt
Method

  1. Preheat oven to 325 F.
  2. Sift the flour once, then sift it again with the sugar and salt.
  3. Cut the butter into the dry ingredients with a pastry cutter, until it starts to form a ball. Use hands to finish mixing.
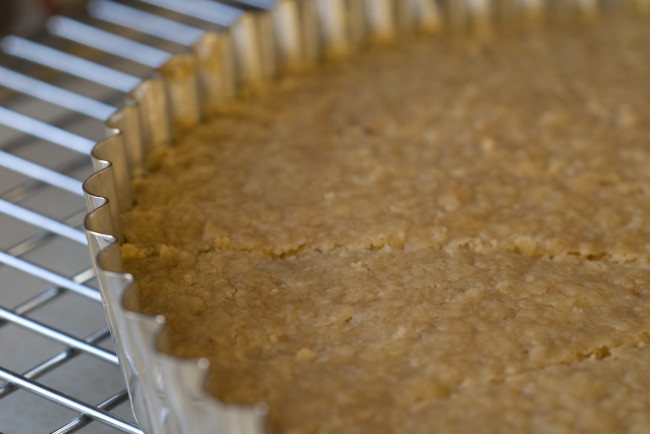
  4. Press the dough evenly into a 9-inch shortbread pan or tart pan. If using the tart pan, you can add a decorative pattern with a fork and score the dough (maybe 1/8 inch deep) into 12 equal wedges before baking.
  5. Bake at 325 F for about 45 minutes or until golden on top.

Yummy Lovin’ Chocolate Chip Cookies

yummyLovinChocolateChipCookie

My interest in baking began back in the fall of 1992. I was a sophomore at San Marin High School (go Mustangs!), dating a girl from my English class. She was the daughter of a minister. I was nervous.

One afternoon as the holidays neared, I went over to her house for some parent-approved cookie baking—just the kind of thing that a girlfriend’s mother loves. I had baked chocolate chip cookies before, always carefully following the recipe on the back of the chocolate chip package. So I was confused that my girlfriend and her mother were deviating from the time-tested wisdom of Toll House. Nothing dramatic mind you, just a bit more flour and a bit less time in the oven for softer cookies. The results were delicious, I’m sure the word “awesome” was used several times.

I brought some cookies to school the following week. I shared a few with my buddies and classmates. They gobbled them up and asked for more. I started taking orders. I made enough money over the course of two weeks to cover Christmas shopping that year. I’m pretty sure I was the only guy on the football team with a side business as a baker.

The girlfriend only lasted 3 months, but I’ve been in love with the cookies for over 20 years. It has been modified countless times over the years, but still draws from its ancestral roots: the Original Toll House recipe. That being said, I still call it my own.

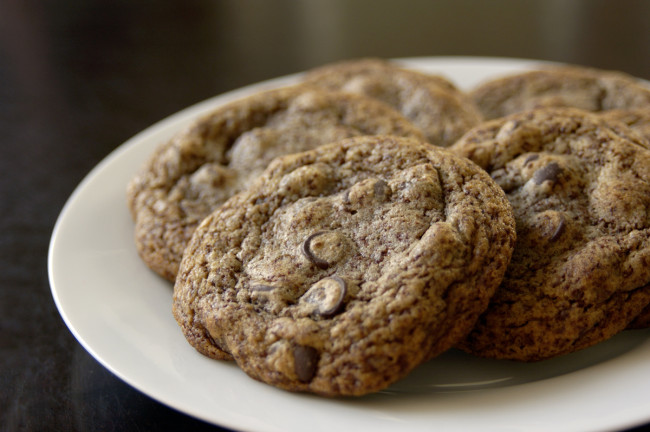
These cookies are chocolate-heavy and very soft. Use the best ingredients you can find—it makes a real difference in the final product. I hope you enjoy.

Yield
About 18-20 cookies. This recipe is just begging to be doubled.

Ingredients

  • 2 ½ cups all-purpose flour
  • 1 teaspoon baking soda
  • 1 ¾ teaspoon salt
  • 1 ¼ cups (2.5 sticks) unsalted butter at room temperature
  • ¾ cup granulated sugar
  • ¾ cup packed brown sugar
  • 1 teaspoon vanilla extract
  • 2 large eggs at room temperature
  • 2 cups (12 oz. package) semi-sweet chocolate chips
  • 4 ounces semi-sweet or bitter-sweet chocolate (shredded on a box grater)*

Method

  1. Combine flour, baking soda, and salt in a medium bowl. Set aside.
  2. Mix butter, granulated sugar, brown sugar, and vanilla extract in a large bowl or (if you have one) a stand mixer with the paddle attachment.
  3. Add eggs to butter/sugar mixture one at a time, beating well after each addition.
  4. Gradually beat in flour mixture. I usually add it in three parts.
  5. Mix in shredded chocolate.
  6. Stir in chocolate chips. At this point, the dough is very thick. Get in there with your (clean) hands to work in the chips.
  7. Portion the dough with a scoop (I use a 2 ¾ ounce blue scoop). Place the portioned scoops close together on a parchment-lined sheet pan.
  8. Pat the scoops down slightly, cover with plastic wrap and then slip the portioned dough into the refrigerator for at least two hours.
  9. Preheat oven to 375 F. Adjust rack to middle position.
  10. Remove six dough scoops from the refrigerator and place them on a sheet pan lined with parchment paper or Silpat.
  11. Bake for 12-15 minutes. They should look a bit undercooked. (cook for less time if you portioned smaller)
  12. Slide parchment paper and cookies directly onto cooling racks. The cookies are very soft and can fall apart quite easily when warm.
  13. Let the cookies cool for minimum 20 minutes before gorging yourself.

* This part, admittedly, sucks. But it is worth the effort.